What is Grbl?
Grbl is a popular firmware for the Arduino Uno, Nano, or any other controller using the Atmega 328p chip, designed to turn it into a fully capable CNC controller.
With Grbl, we can use a PC running aG-code sender in order to send commands to our controller in the form of G-code. Grbl will take care of the hardware side: sending signals to the motors, toggling the spindle, and a lot more.
Grbl is free and open source, and Grbl-compatible G-code can be exported by many CAM programs such as Fusion 360, Easel, Carbide Create, and Freecad. Grbl is also used by the Shapeoko and X-Carve desktop CNC routers among many others.
Grbl versions explained: 0.9 vs 1.1
There are two main versions of Grbl: 0.9 and 1.1. The newer 1.1 version is what we want, as it has a number of improvements such in laser control and jogging (making it compatible with Candle v1.2 and Grbl USB pendants with a jog wheel).
Many guides online still link to the older 0.9. If that’s the version you want, the steps listed in this tutorial are the same.
These are the download links for the Atmega 328p controllers (Arduino Uno, Nano, Micro, and others):
- Grbl 0.9: https://github.com/grbl/grbl
- Grbl 1.1: https://github.com/gnea/grbl
And for the Atmega2560 chip (Arduino Mega):
- Grbl-Mega: https://github.com/gnea/grbl-Mega/
- Grbl-Mega-5X: https://github.com/gnea/grbl-Mega/
Grbl has been ported to other families of microcontrollers, but in this guide we’ll be focusing on the mainstream versions listed above.
- GrblHAL: https://github.com/terjeio/grblHAL
- Grbl_ESP32: https://github.com/bdring/Grbl_Esp32
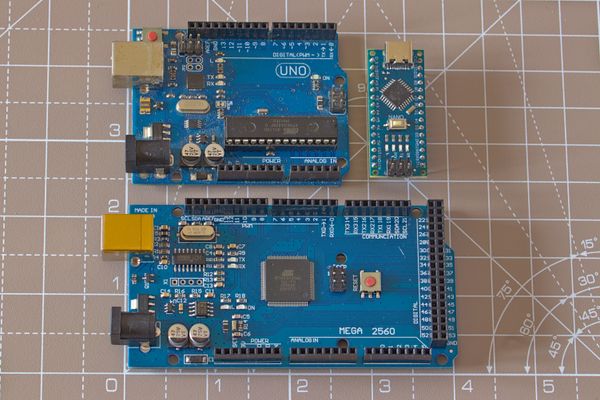
Arduino Uno, Nano and Mega
Installing Grbl on Arduino Uno, Nano, etc.
Installing Grbl is done by flashing an Arduino sketch to our controller. The simplest way is by using the USB port and the Arduino IDE.
1. Install the Arduino IDE
The Arduino IDE allows us to upload Grbl and other programs (“sketches”) to an Arduino.
It’s a free download from https://www.arduino.cc/en/software
2. Remove any existing Grbl installation
You may have already installed a previous version of Grbl as a ZIP library. If that’s the case, we’ll have to remove it before installing v1.1, otherwise the Arduino IDE will refuse to install a second library with the same name.
This is also needed if you want to flash grbl for the Arduino Mega but you have already installed the version for the Uno/Nano/etc.
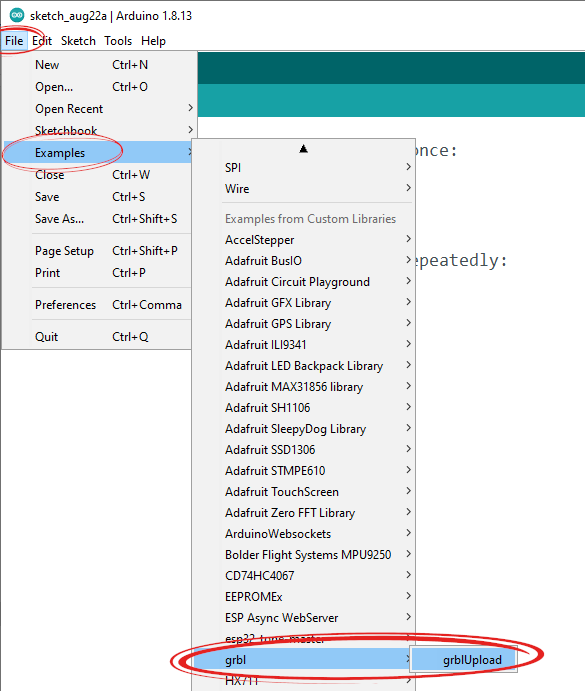
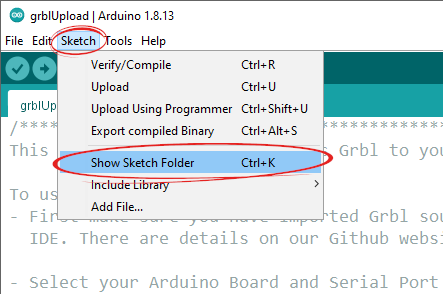
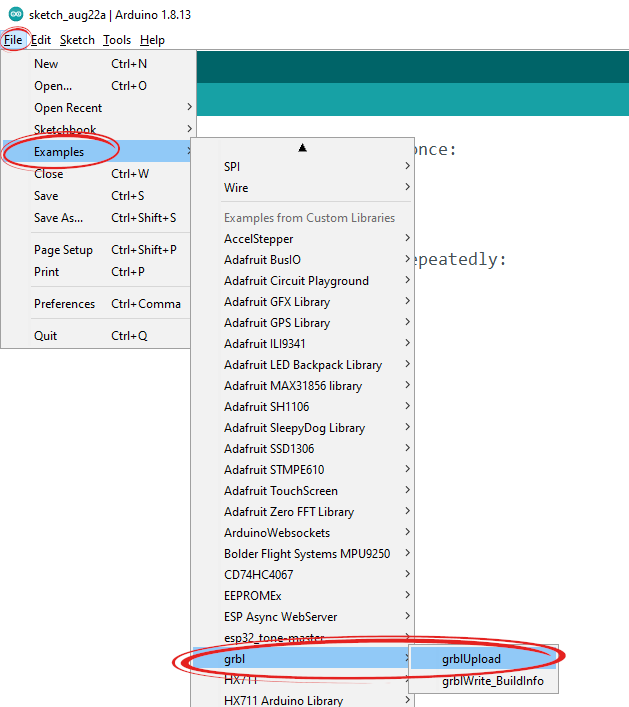
- Check if Grbl is already installed: in the Arduino IDE, click on File > Examples > grbl. There should be a grblUpload example sketch. Open it.
- Open the folder containing the sketch (Sketch > Show Sketch Folder):
- Navigate up to the libraries folder, where all Arduino libraries are listed.
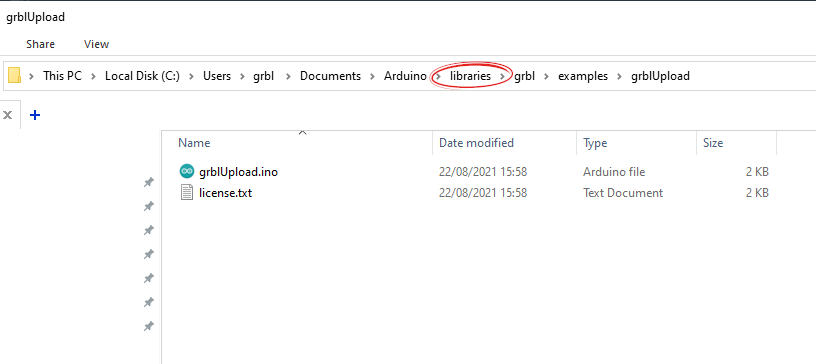
- Delete the grbl directory and restart the Arduino IDE.
3. Download Grbl 1.1
Now let’s download Grbl 1.1 from this page: https://github.com/gnea/grbl
(or Grbl 0.9 from https://github.com/grbl/grbl )
Click on Code, then Download ZIP.
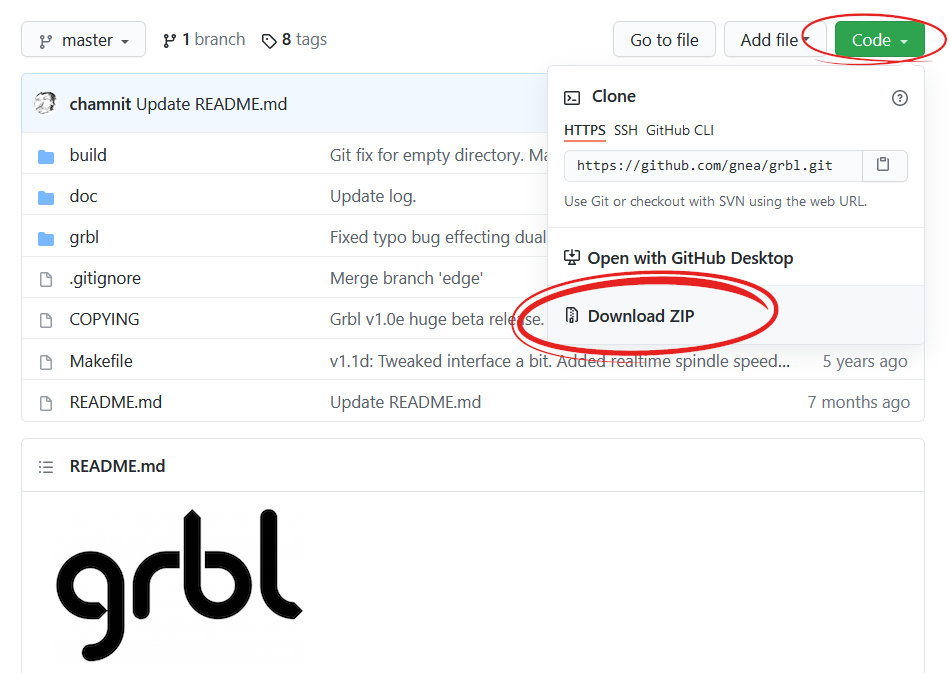
Grbl is downloaded from the Github page as a Zip file. We won't need the .hex available from the Releases page.
4. Unzip Grbl
Unzip the contents of grbl-master.zip. We actually only need the grbl subfolder.
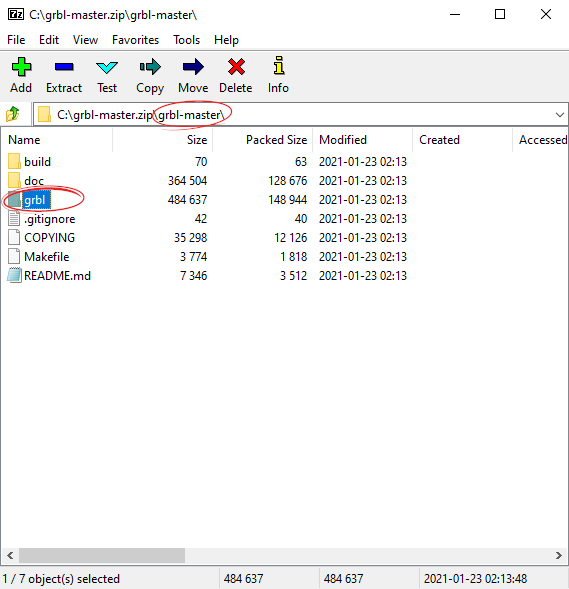
Inside the zip file, there are three folders and other files. We'll only need the 'grbl' folder.
5. Add the grbl folder as a zip library
This is a bit unintuitive: we’ll import the unzipped grbl folder as if it were a zip file.
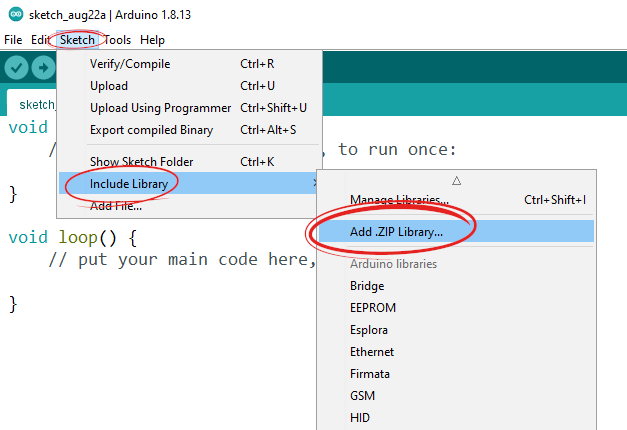
In the Arduino IDE, click on Sketch > Include Library > Add .ZIP Library…
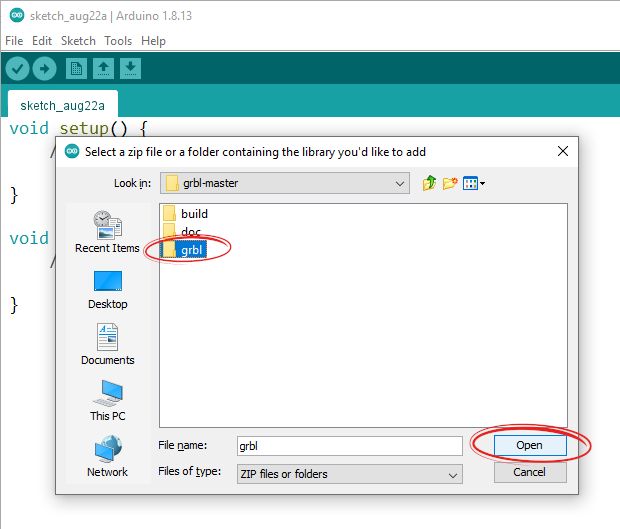
Select the unzipped grbl folder (not grbl-master!) and click Open.
We should see a success message just above the console:
Library added to your libraries. Check “Include library” menu.
6. Open the grblUpload sketch
Open the grblUpload sketch: File > Examples > grbl > grblUpload
7. Connect the Arduino to your PC
We’re almost done.
Connect the Arduino using a USB data cable. Some cables are missing the data line, so if the PC doesn’t recognize the Arduino try another cable.
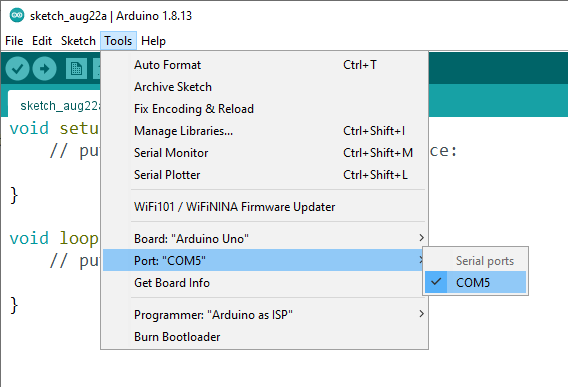
Select the model of Arduino you’re using and the correct COM port if it’s not set automatically.
8. Back up older Grbl settings
If you already have Grbl flashed onto your controller, you’ll probably want to back up the current settings, as they will be wiped when updating to 1.1.
- Open Tools > Serial Monitor
- Make sure the baud rate is set to 115200 for Grbl 0.9 and above. Otherwise you’ll see a bunch of gibberish characters.
- Type
$$and hit enter. This will display all the Grbl settings, which you can copy and paste elsewhere as a backup.
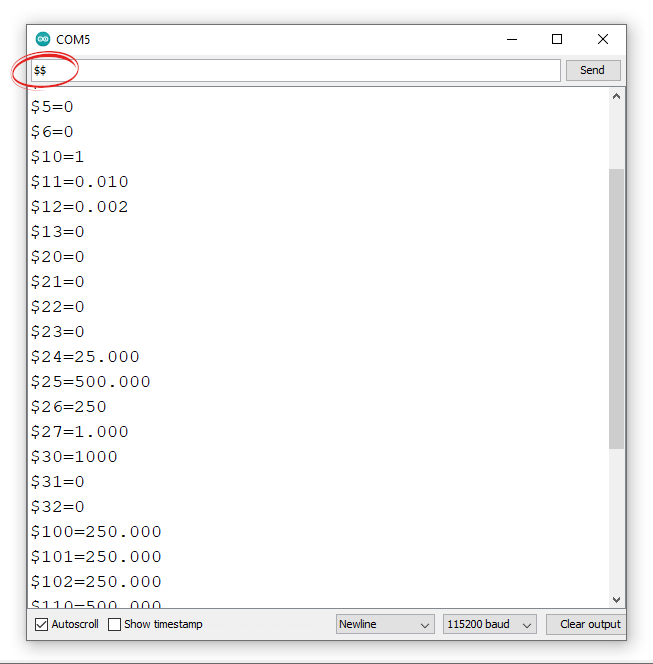
Sending $$ display the current Grbl settings
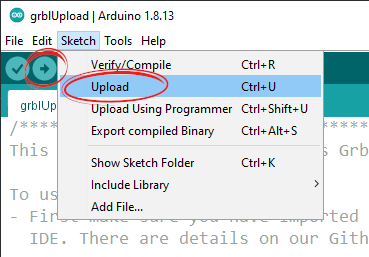
9. Upload the Sketch
Upload the sketch by clicking on the green arrow, or through Sketch > Upload.
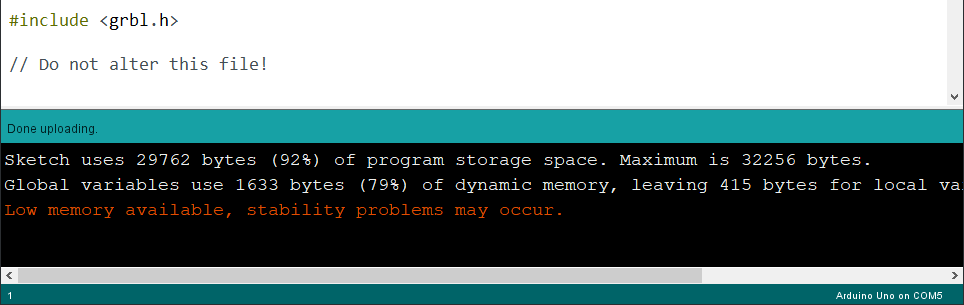
If the upload was successful, we should see this message (you can safely ignore the red warning):
Sketch uses 29762 bytes (92%) of program storage space. Maximum is 32256 bytes.
Global variables use 1633 bytes (79%) of dynamic memory, leaving 415 bytes for local variables. Maximum is 2048 bytes.
Low memory available, stability problems may occur.
10. (optional) Verify the upload & restore settings
We’re done! With the Arduino still plugged in, we can check the Grbl version and settings.
Open the serial monitor (as shown in step #8) and enter $$ to get a list of the settings, or $I to get the version number. Changing settings is easy: for example, to change the steps/mm for the X axis, we need to change the $100 value. This is done by sending $100=800, which sets the X axis to 800 steps/mm.
Here is a full list of all the settings.
Installing Grbl on the Arduino Mega (Atmega2560)
Fortunately, flashing an Arduino Mega is done the same way as with the Uno, Nano, or other 328p microcontrollers. Just download the appropriate Zip file (links at the beginning of this post) and select the the right board before uploading.
You can choose between Grbl-Mega or Grbl-Mega-5X .
The Arduino Mega has 8kb of RAM, which is four times as much as the Uno’s 2kb (that’s why uploading Grbl to the Uno gives us a warning message). However, it doesn’t run any faster.
The main advantage to the Mega is that the popular Ramps Shields (which are designed for 3D printing) have room for up to 5 stepper drivers, which Grbl-Mega-5x supports.
However, usually an Arduino Uno with a CNC shield and four stepper drivers is enough for the most common setup: 3 axes, one of which optionally driven by 2 steppers. This is the setup I would recommend to someone building a small DIY CNC machine like a laser cutter or engraver.